Prompter Anyone?
by Walter Graff
One look in any of the industry trades and you'll see a lot of ads for various teleprompters from $899 to $1500. But if you are good with your hands, you can make one for a fraction of the cost. I did!
I needed to do stand-ups for a low budget infomercial and a prompter person wasn't available near where I needed to do this. Thinking of the extra cost involved in getting someone, and knowing how I've been a one-man-band all along on this reduced budget project, I decided that adding the job of prompter operator to my list of self-executed positions wasn't going to break the bank.
A normal teleprompter comes with a 15 inch screen. But since I was doing single person stand-ups I realized that the 7 inch monitor I have laying around would make a great monitor for my needs. In case you are interested you can purchase a 7 inch LCD monitor for a bit over $100 these days. Keep in mind that you don't need high rez of super color rendition as a prompter plays in black and white, so any inexpensive monitor from a 7 inch like I used to a 15 inch computer monitor that costs $150 will work fine.
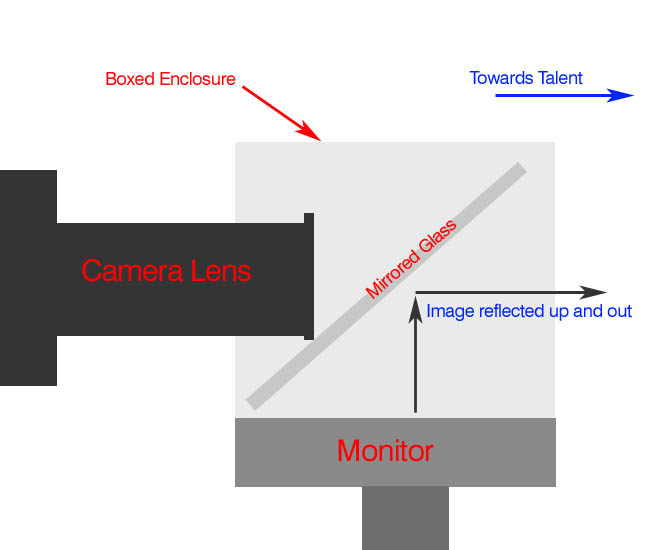
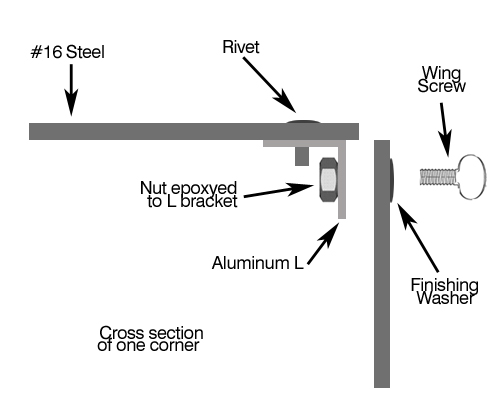
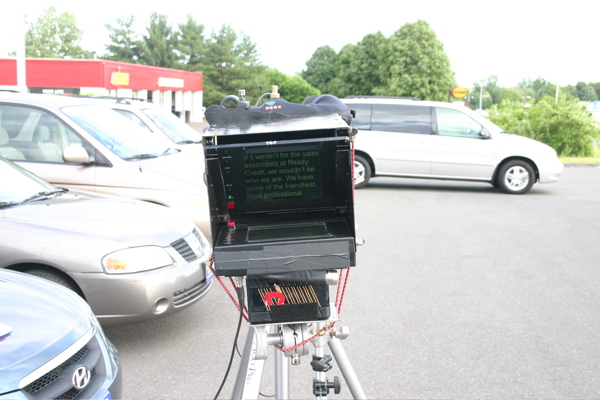
There are two types of design in prompters. The traditional set-up's basically a box with a monitor that lies with the screen facing up. A 45 degree piece of glass (slightly coated with a mirror-like surface) reflects the monitors image to anyone standing in front of the lens. See illustration below.
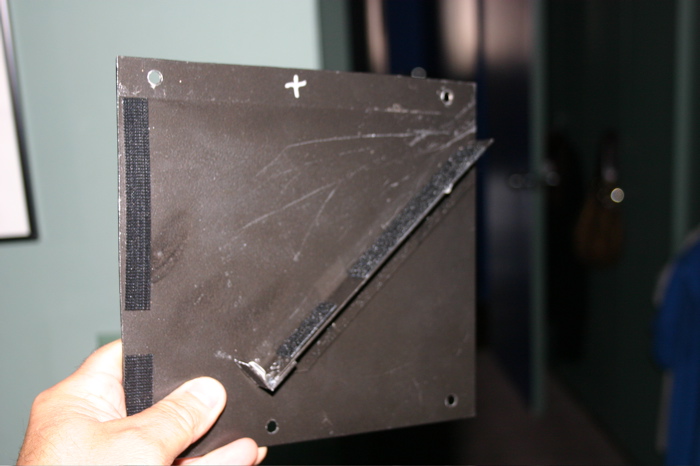
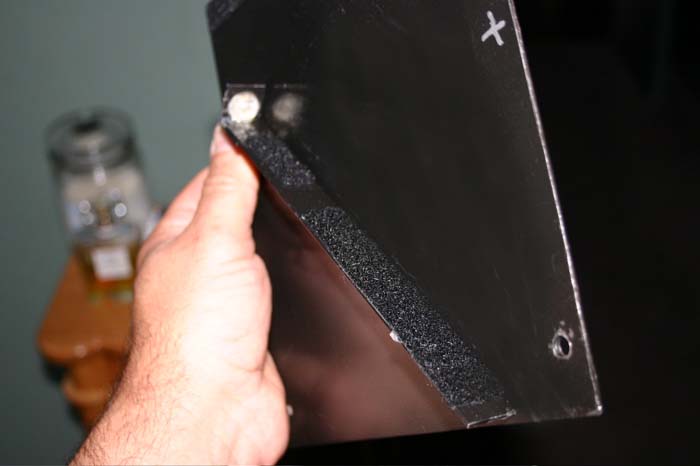
You can use anything from sheet metal to more rigid steel for the enclosure just as long as it will make a ridged box capable of holding the glass. In my case I used 16 gauge steel, a thin but sturdy steel that you can purchase in small sheets at hardware stores such as the Home Depot. They also sell a very thin 24 gauge, but I wanted rock sturdy at the cost of some weight. So pick what works for you. Remember in the end, it has to hold a piece of glass so don't go too thin, like sheet metal.
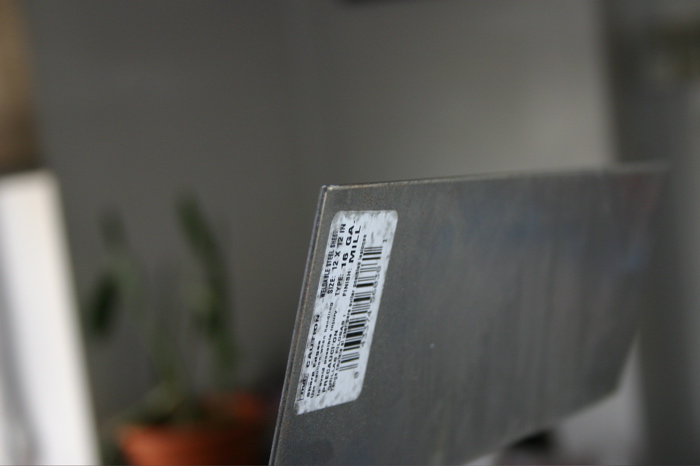
Above: a cross section of the metal I used.
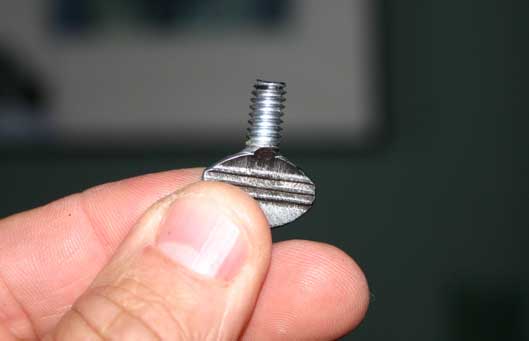
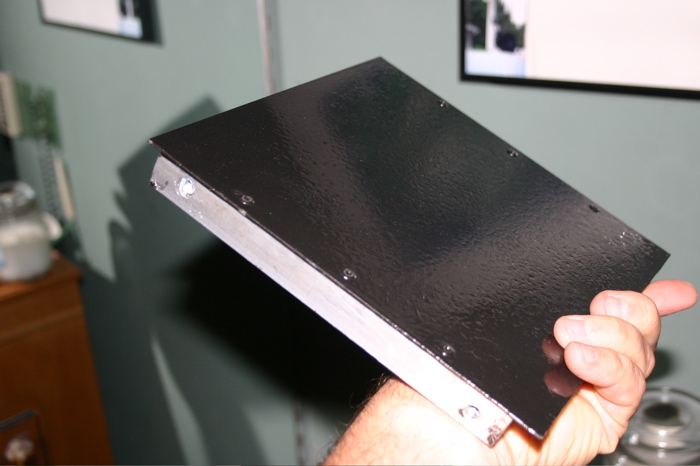
Once constructed, this prompter is about 9 inches square. That can be a pain to transport, so I designed my box to collapse. I've seen folks make hinged-type boxes but I decided on a simple but effective way, using wing screws which I could screw the box together with.
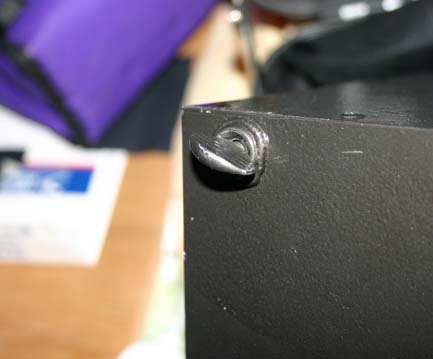
After cutting the metal pieces to the appropriate size necessary to create a box that will fit around the monitor (I used a Dremel tool with a cut off wheel to cut the metal), I needed a way to attach the two sides of the box to the top piece. I cut pieces of aluminum L shaped metal and riveted these brackets to what would become the top panel of the box.
Above: The top panel with L bracket showing. Notice three rivets used to attach it to panel. Also notice this is the painted version. I used a textured paint and baked it on by painting the final assembly, then placing it in an oven at 400 degrees for about 10 minutes. Doing so adheres the paint so it is more difficult to chip or scratch.
Also notice the holes on either end of the L bracket (silver side). I drilled those holes so the wing screws would fit thorough them. Next next thing to do is to give the wing nuts something to screw into. I found nuts that fit the screws and attached them to the inside of the L bracket. Below is the method I used. The following visual presentation is not the actual L bracket but done after the fact so I could show you how it is done.
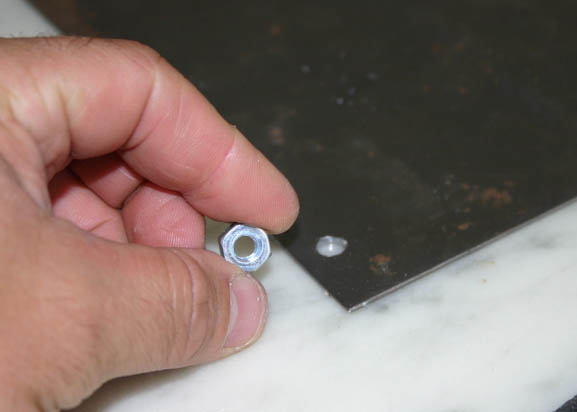
Above: I drilled holes the same size as the screw size
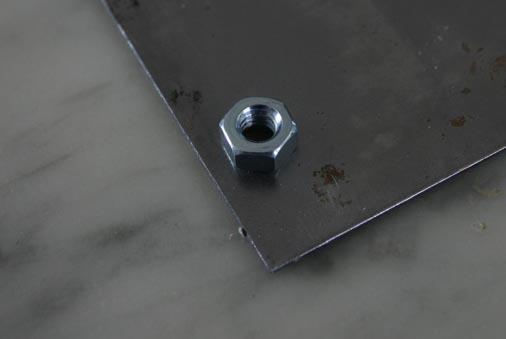
Above: I placed the nut over the hole
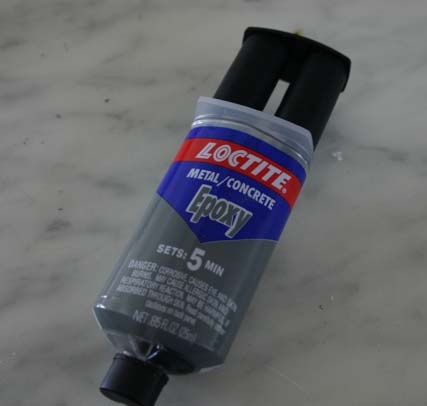
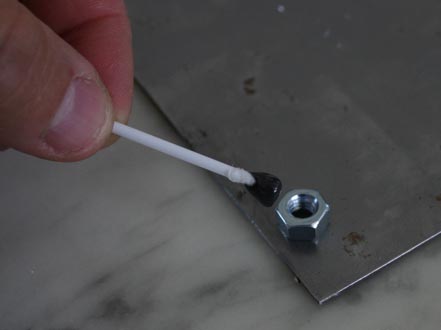
Above and below: Using a metal epoxy and a Q-tip (cotton removed) I epoxied the nut to the steel
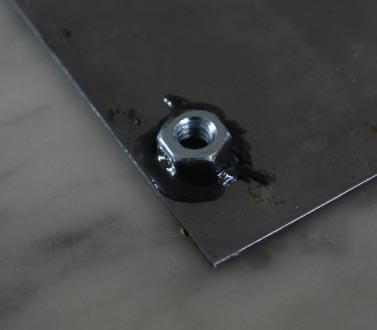
The nut glued and ready to go in about 15 minutes. I ended up gluing four of these to each side of the two L brackets. This will accept the wing screw and make a three sided box once attached.
Above: The finished piece. You are looking at the inside of the top piece of the box frame with screw glued and all painted. Notice how this glue expands to three times its size engulfing he screw like it's been welded.
Next, I lined the side panels up to the top panel, marked the hole location and drilled out the two holes in each side panel. I glued cup washers to the outside of each hole on each side panel so that when I tighten the wing screw it has something to rest on other than simply the painted side of the panel
Above: Left is the cup washer glued to the outside of the side panel. Right is the side panel assembled to the top panel.
Above: Cross section
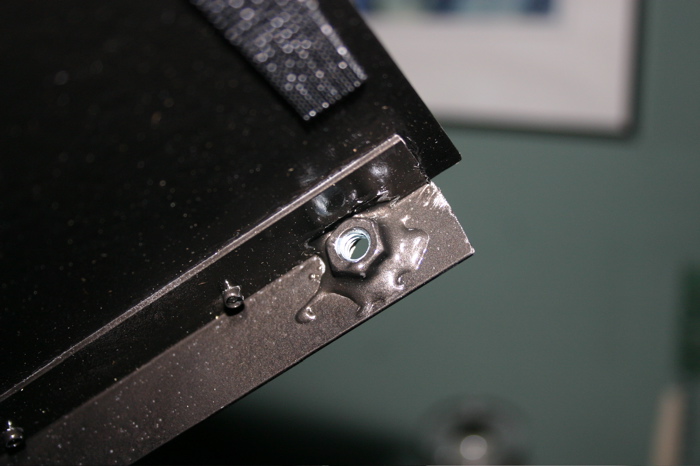
I now have a three sided box, top, and two sides. There are a number of ways I could have attached the three sided box to the monitor such as creating a bracket the monitor rested in or by using using velcro. Since I will use this configuration in the future, I decided to do the same thing to the monitor that I did to the top panel, drill holes and glue nuts inside so I could easily screw the side panels to it. This would allow me to use the monitor on it's own when I needed and as a prompter monitor. And by screwing the monitor to the upper panels I created a rigid box.
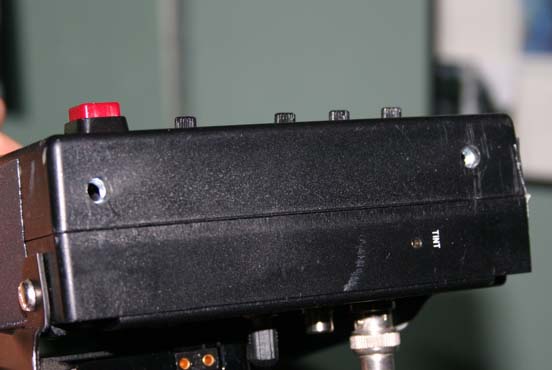
Above: The side of the monitor showing the holes I drilled and the nuts inside of the monitor case.
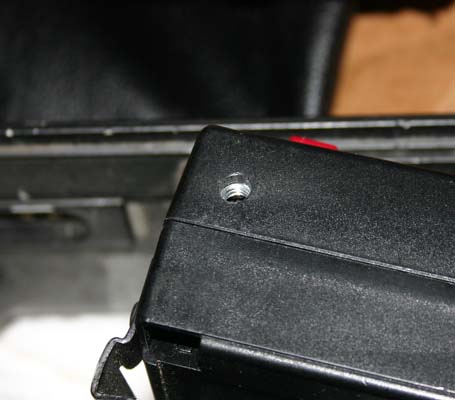
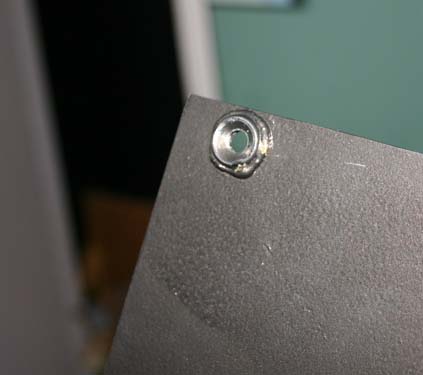
Above: Close-up of one hole
Next I needed to figure out how to make a tray for the glass. A word about the glass. The glass I used is a piece of glass that has a minor reflective coating on it one side (like one way mirror but not such a mirror and not so dark). You can get such glass at a local glass shop. They call it beam-splitting glass. I simply asked to see what varieties they had and found one that cut down light the least, while offering a slightly reflective surface so the monitor could be seen by the reader. You will end up with glass that cuts light down anywhere from 1/2 stop to 2 stops. If you really are handy, you can make your own beam-splitting glass. Read this.
The glass needs to be at a 45 degree angle when installed to work properly. I used more of the L bracket and attached a piece to either side of the inside of the sides of the prompter box with rivets making a tray the glass could lay in. I also attached a small piece to the bottom of the bracket to act as a stop so the glass would not slide down. I put a small clear rubber stopper on the back of the tray and added the softer side of velcro strips to the bottom of the tack so the glass had something to rest on. See below.
Above: The attached L bracket with the additional stopper at the bottom and velcro on the track where the glass will rest.
Above: Another angle looking down at glass tray with velcro and rubber stopper visible.
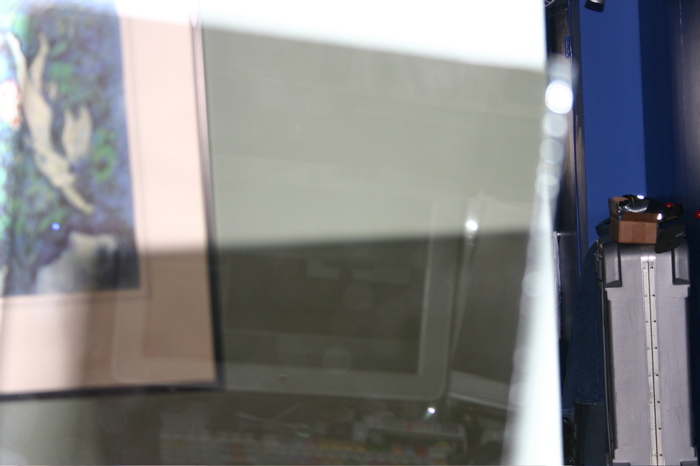
Above: A blurry shot looking through the glass. Notice the reflection of the computer monitor and keyboard in what is the mirrored side of the glass. facing the camera here.
And for the final touch I needed something to prevent light from spilling into the box from the camera side. If you don't stop the light from being seen by the talent it washes out the reflected lettering on the glass. Prompter people use a simple method of attaching the sticky side of Velcro all the way around the inside of the box on the lens side, then using a piece of black material simply stick it to all sides. That's what I did also.
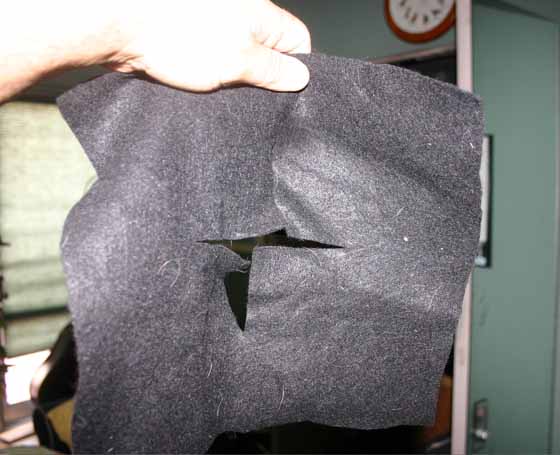
Above: The material I cut to fit the backside of the prompter hole. Notice I cut a hole at the center of the material so I could fit the lens through it. A picture if the material in action appears later.
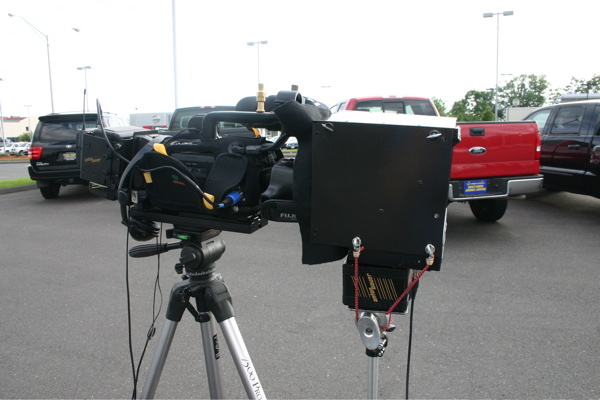
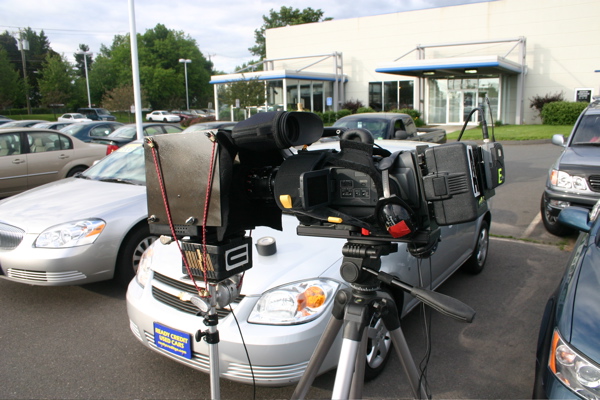
I did not go crazy with a method of mounting this. There are two ways to mount a prompter. One is called free standing. Freestanding prompter means the prompter sits on it's own stand in front of the lens. This method doesn't allow much camera panning. The second method is to mount the camera to the camera plat and tripod. This method give the most mobility and allows you easy pan and tilt.
In my scenario I only needed it to sit in front of the camera so I went with the free sanding method. As the pictures below showed, I took a six inch Matthews plate and placed the stud into a grip knuckle attached to a stand. The flat side of the plate now acts as a small table. Since my monitor has a Anton Bauer fitting and battery I simply added a piece of velcro to the top of the plate and the battery and used four small bungies for extra support. It worked perfectly. There are many more ways of making a freestanding adaptor and if need be a metal or wooden riser so it can be attached to the front of the camera and tripod.
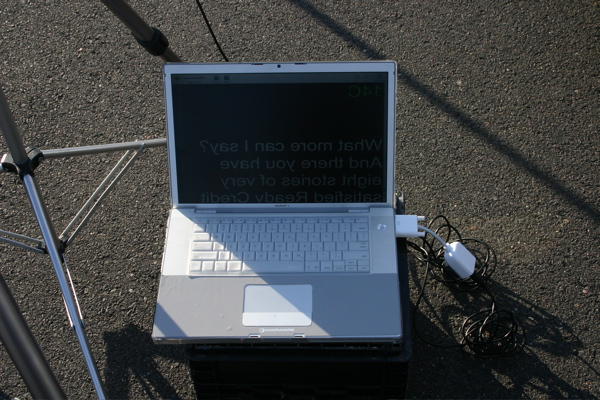
For prompter software I purchased Presentation Prompter for MAC for $65. Using my Mac Book Pro and a video out adapter, I had an easy prompter. And best of all, you can use the wireless remote control that comes with the Mac. Download software called Mira for free. Mira software allows you to reprogram the remote so it works with any software. I programmed the play button to start and stop, the up and down for faster and slower, and the forward and rewind buttons to jump back and forth between markers.
Such a project will cost you about $50 in materials, at least $100 for a monitor and $50 for the glass. It's an inexpensive solution to purchasing a prompter, as long as you are handy and like building things. I could have made this for a 15 inch monitor or any size for that matter.
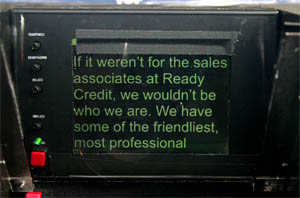
Here's the prompter in action in this short clip of my talent reading.
Next, I'll show you how to make a 15 inch version with a cool V- shape design that folds itself into the monitor face for easy transport. Look for that article soon.
If you build one for yourself, please send me a photo or two of your design.
Copyright 2013 by Walter Graff. This article may be circulated and shared as long as the following reference is made: 'This article appears courtesy of Walter Graff- http://www.waltergraff.com'
Please don't hesitate to send me an e-mail if you have any questions or comments please e-mail me at Walter@waltergraff.com