Another look at Greenscreen
by Walter Graff

What do you do when you are given an hour to set up a green screen, only to find out the room your shooting in is locked, you have no key, and that means security has to be called, which of course means you’ll end up eating 20 minutes of time waiting for someone with a key, which means you end up getting a half hour to set up? In my world that simply means setting up faster. Some may shutter at the thought of setting up a green screen that fast and having it work properly, but it shouldn’t be a problem.
I thought I’d walk you through my set-up and show you what was going on in my mind as I completed the final set-up. This was a pick-up shot for a pharmaceutical company. We had a strict schedule so I knew that when they said 8 a.m. they meant it.
7:20a.m. Entry to the room is complete. The room was rectangular with lots of conference tables, so first thing was to make it a clear room to work in. We moved the tables and chairs to either side of the center. I also had the additional burden of a prompter operator so first thing to set-up was the camera so he could get to work.
7:25am The room is clear and the tripod in place. First things first and that means setting up the green screen. I’ve brought my 12x15 green screen material that I keep neatly folded in a shopping bag. As neat as I fold it, inevitably it will wrinkle. I’m not worried as it’s a stretch material and that means any wrinkles can be pulled out. I set-up two C-Stands about 10 feet apart. Next I use the 20 spring clamps I have with me to fasten to two top edges of the screen to the tops of the poles. Working down both sides I make a relatively tight stretch of the material eliminating most of the wrinkles. A few minutes stretched out and whatever is left over will also disappear so I let time work for me, although the clock is ticking.
7:40am I’m juggling two things at once. My prompter person is ready to mount his set-up and that needs two people at the ready. In the mean time I’ve taken out six light stands as I know what I am going to do lighting-wise. The green screen will have to be fast and furious. I use two open face ARRI 1ks to illuminate it, both set on wide beam. Using the zebras in the camera viewfinder, I adjust both until I have a relatively smooth area around where my talent will stand.
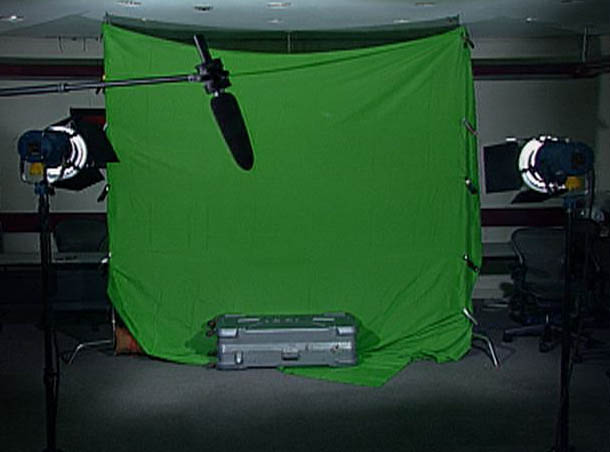
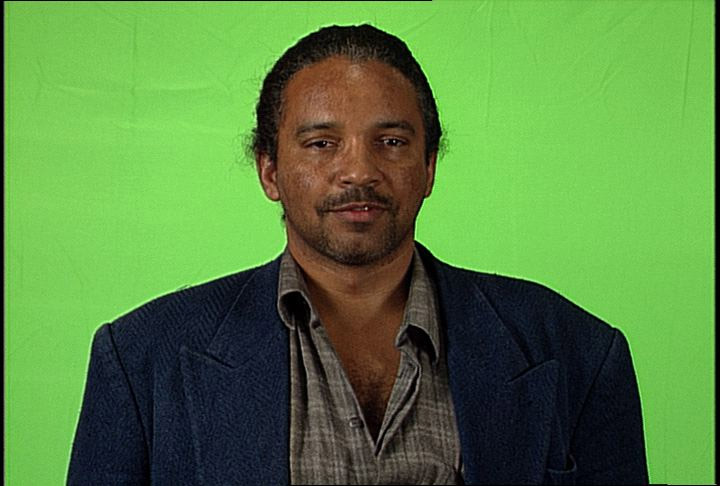
The shot is going to be a medium close-up so all I need to do is make sure the green area around the talent is evenly lit. I’m not concerned with the edges as if there is a problem, they can simply mask the edges to clean up any mess and guarantee a clean key.
7:45am My audio guy is setting up his end of the deal and putting bars and tone on the tape. I’ve got a clean background as I look in the viewfinder so I’m ready to move on. Step two in any green screen is to now turn off the lights on the green screen.
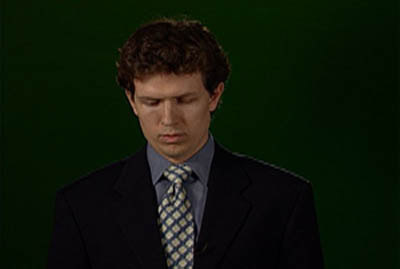
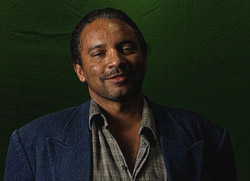
Lighting my talent and the green screen have little to nothing to do with each other in reality. In other words, I light the green screen for proper illumination, and now I turn it off as it is very confusing to try lighting a person in front of a green screen while being able to see the distinction clearly. As you can see in the two photos below, when the green screen is dark, I get a much better read on how well I am lighting the person for who he is.
8:00am I’m ready to go!
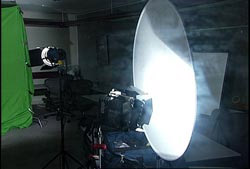
My usual tactic in this situation is to light pretty even with one side being slightly brighter than the other. To the right is the key and fill for such a situation. Basically I use a 1k fresnel through a 4x4 frame as seen in this photo:
For the fill, I not only want a different level of light but a different quality of light. So I use a 600 watt Lowel light bounced into a flex fill as seen in this photo:
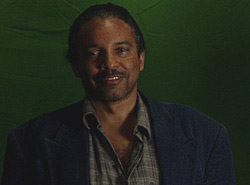
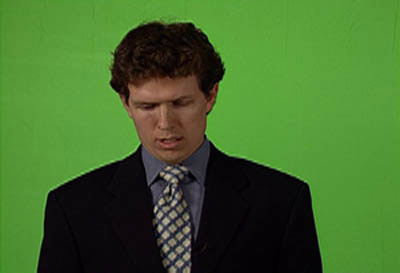
As the two photos above demonstrate, I have turned off my green screen in order to adjust the levels on the talent to my liking. Had I tried to do this set-up with the green screen on, it would have been confusing. I show what it looks like combined in photo below.
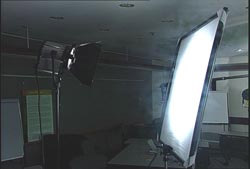
Here is the talents key light, a 1k fresnel through a 38 inch photoflex frame.
And here is his fill, a 600 watt omni bounced into a 38 inch reflector.
(ghost images in both photos are of the prompter glass before it was cleaned.)
About the only thing left now is a back light. I don’t have a rhyme or reason for using one with chroma keys, rather I simply know when I want one or not. I guess it’s my years of working with keys that tells me if I am going to be able to help the person cutting the key if I use one. And of course, I have to still consider what the background element might be. In this case I really don’t know what it will end up being. But what if it was a moonlight scene on a ship, I might want a strong blue back light. Some say backlights in this case need to have straw or orange. I disagree. 99% of the time, as long as you don’t see light leakage from the background on your talent, a back light is your call. In this case I did decide to use a general back-light placed just above the green screen and that lights effect is seen in the photo below.
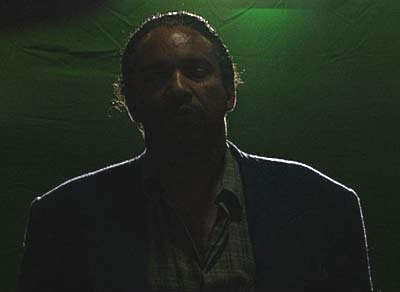
A backlight has two purposes; it helps make sure that you can cut a clean key and/or is part of the effect for the background plate (my moonlight example). In this case I simply add a rim of light around the talent to help the editor cut a clean key since I don't know what the final element for the background would be. It doesn’t have to be bright, just enough to make an edge.
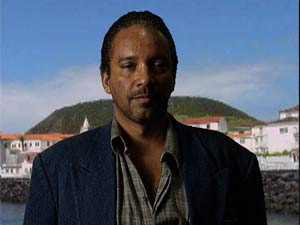
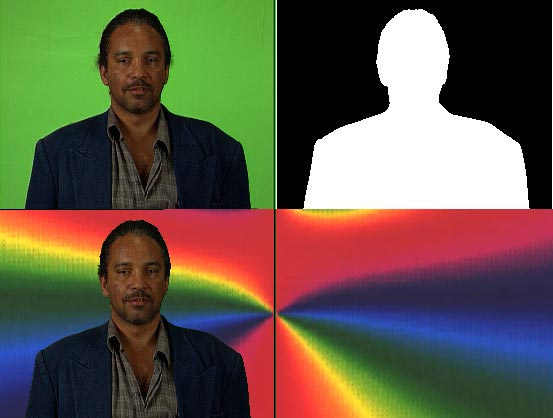
All the elements and the key signal are shown below (final background image used only for the purpose of this article. As I said, I was not editing this and the producers told me they did not know exactly what was going to be in the background.)
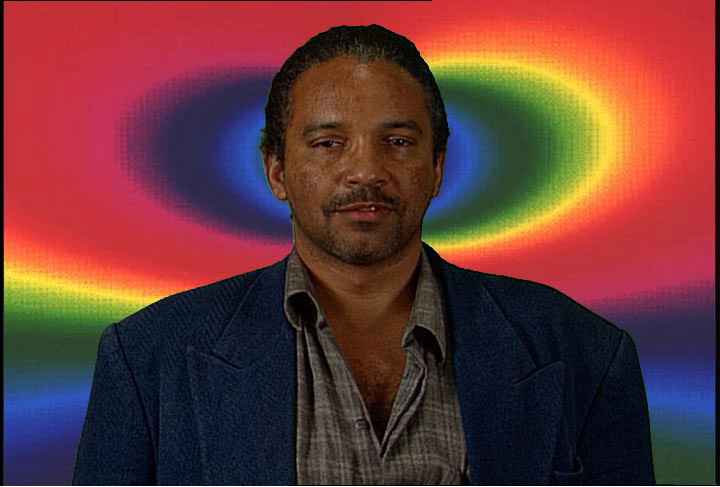
Below is what a final product might look like. Remember this is not what they used, and this is not the final talent, rather it’s my audio guy standing in and me simply adding a background. I pleased with how it keyed in the end.
If you would like to learn more about green screen, Disk #008 in my series titled "Green Screen For Idiots " is now available. This one hour and 40 minute disk walks you thorough a real-world green screen TV commercial that is shot and produced by Walter Graff showing you everything from set-up to post production. It is a must for anyone wanting to learn all there is about the nuances of lighting, shooting and editing green screen. Click here to learn more.
Copyright 2013 by Walter Graff. This article may be circulated and shared as long as the following reference is made: 'This article appears courtesy of Walter Graff- http://www.waltergraff.com'
Please don't hesitate to send me an e-mail if you have any questions or comments please e-mail me at Walter@waltergraff.com